on
3 Approaches to Applying Blur Effects in iOS
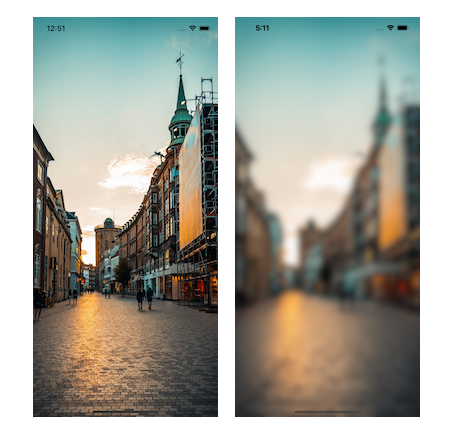
It’s a fairly common requirement to apply a blur effect to iOS content. This article introduces three different approaches by using three different iOS frameworks: UIKit, CoreImage, and Metal.
1. Using UIBlurEffect to Blur Image
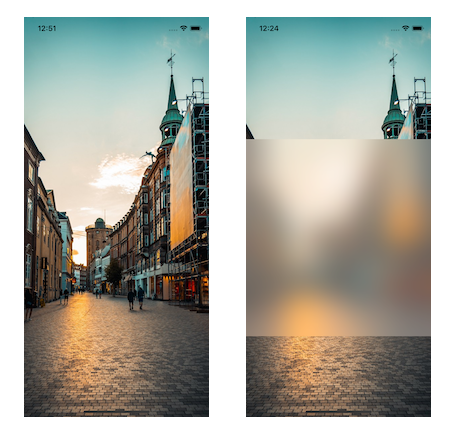
UIBlurEffect is a neatly designed UI element in UIKit. By using it along with UIVisualEffectView, a visual effect view is added on top of the background content.
To add the blur effect, do the following:
let blurEffect = UIBlurEffect(style: .light)
let blurEffectView = UIVisualEffectView()
blurEffectView.frame = CGRect(x: 0, y: 0, width: imageView.frame.width, height: 400)
blurEffectView.center = imageView.center
self.imageView.addSubview(blurEffectView)
UIView.animate(withDuration: 5) {
    blurEffectView.effect = blurEffect
}
Here’s what is happening:
-
There were a bunch of blur styles introduced in UIBlurEffect.Style. We are using
.lightfor this example. -
The instance of
UIVisualEffectViewis initialized with the specific height and centered with the background image. -
We add the instance of
UIVisualEffectViewas a subview of the image view. -
We apply the blur effect with animation for a duration of five seconds.
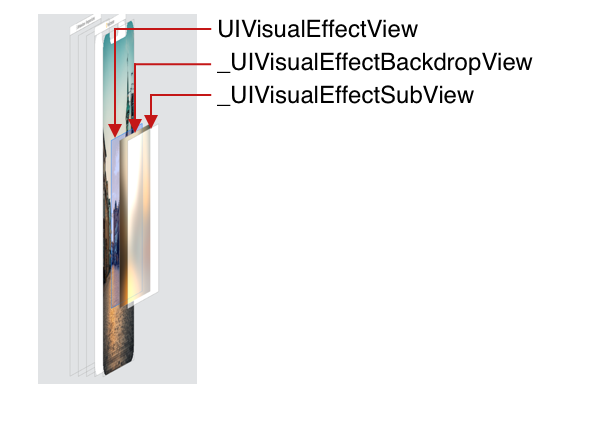
UIVisualEffectView contains another two private layers (UIVisualEffectBackdropView and UIVisualEffectSubView) that would be interesting to explore.
Pros
-
UIBlurEffectcan apply the custom blurred frame on the background content. -
UIBlurEffectis at the UIKit level without the need to worry about the lower-level details.
Cons
-
UIBlurEffectonly has a bunch of built-in system filters and can’t be customized. -
UIBlurEffectadds additional layers on top of the background content. It does not change the content itself. -
UIBlurEffectis a UIKit framework using CPU computation — no GPU acceleration.
2. Apply CIFilter to the Image
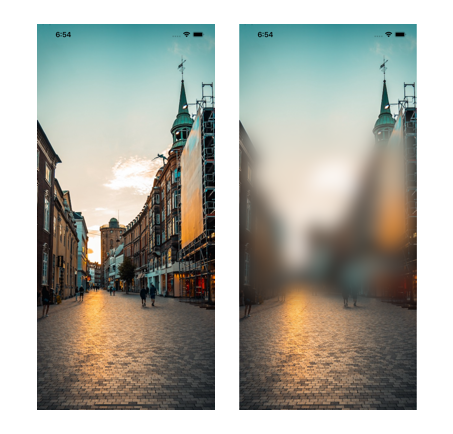
CIFilter is the image processer in the Core Image framework. It has dozens of built-in image filters and offers the ability to build your own custom filters. Core Image can use OpenGL/OpenGL ES for high-performance, GPU-based rendering for real-time performance. It can also use CPU-based rendering with Quartz 2D if it doesn’t require real-time performance.
To apply the blur effect for this example, we use CIFilter with CIGaussianBlur type:
extension UIImage {
    func blurredImage(with context: CIContext, radius: CGFloat, atRect: CGRect) -> UIImage? {
        guard let ciImg = CIImage(image: self) else { return nil }

        let cropedCiImg = ciImg.cropped(to: atRect)
        let blur = CIFilter(name: "CIGaussianBlur")
        blur?.setValue(cropedCiImg, forKey: kCIInputImageKey)
        blur?.setValue(radius, forKey: kCIInputRadiusKey)

        if let ciImgWithBlurredRect = blur?.outputImage?.composited(over: ciImg),
           let outputImg = context.createCGImage(ciImgWithBlurredRect, from: ciImgWithBlurredRect.extent) {
            return UIImage(cgImage: outputImg)
        }
        return nil
    }
}
-
To be easily reused across the app, we add the
blurredImagefunction to theUIImageextension. -
CIContextis height-weight and expensive. It’s recommended to be initialized only once. -
radiusis the custom blur effect and can be specified with the keykCIInputRadiusKey. -
atRectspecifies the blurred effect’s location and size. -
We first convert the
UIImagetoCIImageto use theCoreImageframework. -
We crop the new
CIImagewith the custom frame. -
The gaussian blur filter is initialized and applied with the cropped image as
kCIInputImageKey. -
compositedcombines the blurred image with the original image into one. -
The
CGImageis created fromCIImageand then converted toUIImagefor UI rendering.
Pros
-
CIFilterhas dozens of built-in image filters and offers the ability to build your own custom filters. -
Core Imagecan be high-performance with GPU-based rendering. -
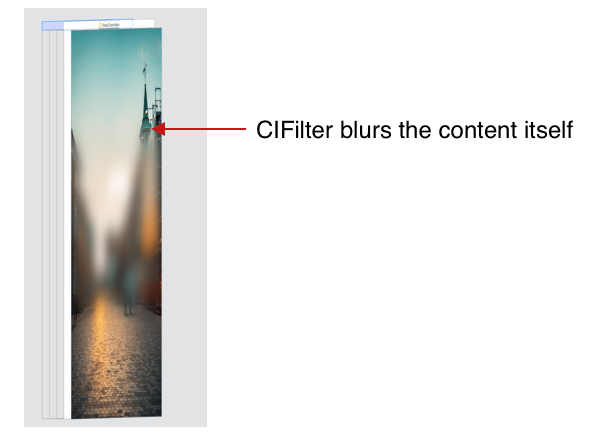
CIFiltermodifies the content itself and can be applied to real-time rendering. -
CIFilterhas the ability to specify the blurred area of the content. -
CIFiltercan be subclassed to provide custom and chained filters.
Cons
-
CIFilterexposes the complexity ofCore Image, which is hard to manage. -
CIFilteruses key-value coding. It’s a bit error-prone.
3. Metal, the GPU Acceleration Way
Metal allows us to use GPU directly to perform computing and graphics operations. In doing so, we also free up the CPU so that it is available for other operations. GPU is optimized for highly parallel workflows. It can perform graphics tasks faster and more efficiently than the CPU. A few Apple frameworks, including Core Image, use Metal under the hood to delegate graphic workloads to the GPU, while Core ML uses Metal to perform its low-level operations on the GPU.
// Instance of MTKView
@IBOutlet weak var mtkView: MTKView!

// Metal resources
var device: MTLDevice!
var commandQueue: MTLCommandQueue!
var sourceTexture: MTLTexture!

// Core Image resources
var context: CIContext!
let filter = CIFilter(name: "CIGaussianBlur")!
let colorSpace = CGColorSpaceCreateDeviceRGB()
-
To use the
Metalframework, we first initialized the instance ofMTKViewthat is for rendering content. -
The instance of
MTLDevicerepresents the GPU to use. -
The
MTLCommandQueueexecutes the render and computes commands on the GPU. -
The
MTLTextureobject holds aMetaltexture that contains the image to be processed by the filter. -
CIContextis height-weight and expensive. It’s recommended to have one universal instance across the app. -
We apply the
CIGaussianBlurfilter to the image. -
We use
CGColorSpaceCreateDeviceRGBfor the output image color space.
override func viewDidLoad() {
    super.viewDidLoad()

    device = MTLCreateSystemDefaultDevice()
    commandQueue = device.makeCommandQueue()
    let textureLoader = MTKTextureLoader(device: device)
    sourceTexture = try! textureLoader.newTexture(cgImage: UIImage(named: "street.png")!.cgImage!)
    let view = self.mtkView!
    view.delegate = self
    view.device = device
    view.framebufferOnly = false

    context = CIContext(mtlDevice: device)
}
-
We initialize the
deviceandcommandQueueat theviewDidLoad(). -
MTKTextureLoadercreates theMetaltexture fromUIImage. -
We set up the
MetalKitview with delegate and device. -
Creating
CIContextby using the sameMetaldevice as the view saves the performance costs of copying data to and from separate CPU or GPU memory buffers.
extension ViewController: MTKViewDelegate {
    func draw(in view: MTKView) {
        if let currentDrawable = view.currentDrawable,
           let commandBuffer = commandQueue.makeCommandBuffer() {

            let inputImage = CIImage(mtlTexture: sourceTexture)!.oriented(.down)
            filter.setValue(inputImage, forKey: kCIInputImageKey)
            filter.setValue(10.0, forKey: kCIInputRadiusKey)

            context.render(filter.outputImage!,
                to: currentDrawable.texture,
                commandBuffer: commandBuffer,
                bounds:  mtkView.bounds,
                colorSpace: colorSpace)

            commandBuffer.present(currentDrawable)
            commandBuffer.commit()
        }
    }
}
-
We implement the
draw(in:)method of theMTKViewDelegateto apply the filter to the image. -
.oriented(.down)plays an important role here to rotate the image to the right orientation. -
We apply the filter with a radius of 10, but surely it can be customized.
Pros
-
The
Metalframework is high-performance because it uses GPU parallel computing. -
Metalis fully customizable and can apply different user-defined filters to the content. -
MetalTexture can be configured with real-time video flow. -
MTKViewDelegateperforms the draw method up to 60 times per second. We can use this opportunity to vary filter parameters over time to create smooth animation and real-time filters. -
Metalmodifies the content to apply the filter.
Cons
-
Metalcan be complicated when using Metal Shading Language (MSL), which is derived from C++. The.metalcode runs on the GPU and is referred to as a shader. -
The learning curve is steep when working with the vertex shader and 3D coordinates.
Conclusion
The article provides three different approaches to adding the blur effect to an image in iOS. These approaches work with applying the blur effect to any instances of UIView.
There is a lot more potential to explore. Thank you for reading. Please leave any questions you might have in the comments.
All code mentioned above can be found in this GitHub repo.
Original post: https://betterprogramming.pub/three-approaches-to-apply-blur-effect-in-ios-c1c941d862c3