on
Add shadow and better shadow performance on views
Here’s a simple example to get you started:
let yourView = UIView()
yourView.layer.shadowColor = UIColor.black.cgColor
yourView.layer.shadowOpacity = 1
yourView.layer.shadowOffset = .zero
yourView.layer.shadowRadius = 10
There are four you need to care about:
-
shadowColorsets the color of the shadow, and needs to be a CGColor. -
shadowOpacitysets how transparent the shadow is, where 0 is invisible and 1 is as strong as possible. -
shadowOffsetsets how far away from the view the shadow should be, to give a 3D offset effect. -
shadowRadiussets how wide the shadow should be.
Be warned: generating shadows dynamically is expensive, because iOS has to draw the shadow around the exact shape of your view’s contents. If you can, set the shadowPath property to a specific value so that iOS doesn’t need to calculate transparency dynamically. For example, this creates a shadow path equivalent to the frame of the view:
yourView.layer.shadowPath = UIBezierPath(rect: yourView.bounds).cgPath
How to solve the masksToBounds problem with the shadow of UIView?
All layers have masksToBounds property. If masksToBounds = true – It will clip all layers that are bigger than their superlayer. And this is a useful property. As we know the shadow is an element out of view box. And it will be clipped with masksToBounds = true. And it is a problem! Another problem is image. We can’t clip image if masksToBounds = false. So it is impossible to create an image like bellow with the only view.layer property
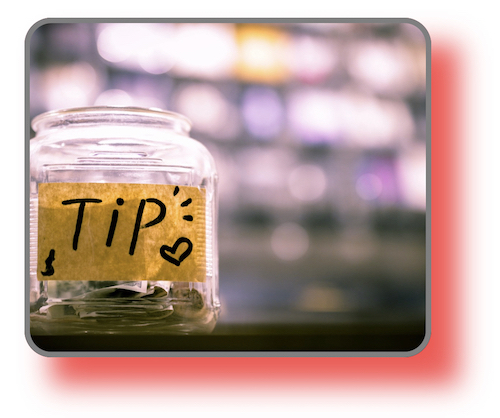
It is difficult because of image needs masksToBounds = true, and red shadow needs masksToBounds = false.
let rect = CGRect(x: 40, y: 100, width: 300, height: 250)
let view = UIView(frame: rect)
view.backgroundColor = UIColor.systemPink

//Add Shadow
view.layer.shadowColor = UIColor.red.cgColor
view.layer.shadowOffset = CGSize(width: 20, height: 20)
view.layer.shadowRadius = 10.0
view.layer.shadowOpacity = 0.7
view.layer.shadowPath = UIBezierPath(rect: view.bounds).cgPath

//Add cornerRadius
view.layer.cornerRadius = 20.0
view.layer.borderColor = UIColor.gray.cgColor
view.layer.borderWidth = 4.0

//Add image as CALayer
let image = UIImage(named: "image.png")
let imageLayer = CALayer()
imageLayer.contents = image?.cgImage
imageLayer.frame = view.bounds
imageLayer.masksToBounds = true //Only imageLayer will be masked
imageLayer.cornerRadius = 20.0
imageLayer.contentsGravity = .resizeAspectFill
view.layer.addSublayer(imageLayer)
self.view.addSubview(view)
In the code above, we have a default layer setup – cornerRadius, shadow, and border. We need view.layer.masksToBounds = false, shadow effect will be invisible if masksToBounds will be equal to true.
The trick in the image layer. As we can’t set masksToBounds for the parent layer, we can create another layer only for image and mask it. And it is a cheap trick to have a few layers with different masksToBounds value.
Better shadow performance on views
There are two different uses for the shadowPath property on CALayer:
-
Improving the performance of having a shadow
-
Creating shadows that don’t match the contents of the view. Check out Apple’s Using Shadow Path for Special Effects.
For performance reasons, always set a shadowPath. This is a substantial improvement, especially if the view changes position via animation or presence in a scroll view.
When you can set a path
The shadowPath tells the system what should be casting a shadow without having to look at the contents of the view itself. Since most views that need a shadow are opaque, we just need to describe the appearance of the background of the view.
Using the convenience initializers on UIBezierPath we can create ovals, squares and rounded rectangles without difficulty. For more complicated paths, check out A Primer on Bézier Curves. You can still use UIBezierPath or CGPath to create them, but it will require more complicated math.
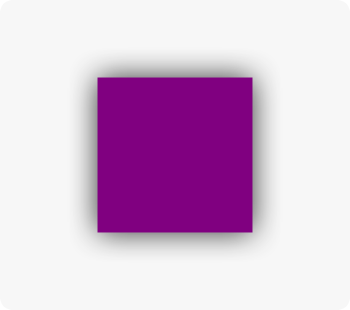
Starting with a simple, purple view with a shadow:
let purpleView = UIView()
purpleView.backgroundColor = .purple
purpleView.layer.shadowRadius = 10.0
purpleView.layer.shadowColor = UIColor.black.cgColor
purpleView.layer.shadowOffset = CGSize()
purpleView.layer.shadowOpacity = 0.8
We can tell the system to draw a shadow for the entire square:
purpleView.layer.shadowPath = UIBezierPath(rect: purpleView.bounds).cgPath
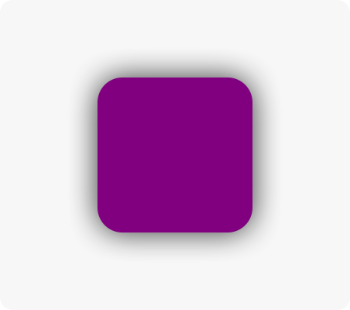
For rounded corners, we can set the cornerRadius property on the layer, and create a matching shadowPath:
purpleView.layer.cornerRadius = 16.0
purpleView.layer.shadowPath = UIBezierPath(roundedRect: view.bounds, cornerRadius: 16.0).cgPath
When you can’t set a path
Sometimes it’s not possible to set a path because there’s no easy way to describe the contents of the view. For example, text is a mess of random contents. Rasterizing the layer avoids having to draw the shadow repeatedly.
// create our label
let label = UILabel()
label.textColor = .purple
label.text = NSLocalizedString("Swift Lemma!", comment: "")
label.layer.shadowOpacity = 0.6
label.layer.shadowColor = UIColor.black.cgColor
label.layer.shadowOffset = CGSize(width: 0, height: 2)

// render and cache the layer
label.layer.shouldRasterize = true
// make sure the cache is retina (the default is 1.0)
label.layer.rasterizationScale = UIScreen.main.scale
This produces a view that looks like this:

Conclusion
Always set the shadowPath inside either layoutSubviews() or viewDidLayoutSubviews(). Since Auto Layout likely means there aren’t constant sizes for views, setting a shadowPath elsewhere may become outdated or incorrect.
When creating a path, the coordinate system for the path is the layer it’s applied to. To make it easier, pretend the shadow path is a subview. For this reason, we use the bounds of the view to create its shadow path.